cheapino
Miscellaneous tips and tricks
First-time builder tips
Building a Cheapino can be challenging for beginners. Here are some key tips based on real user experiences:
Soldering technique
- Always use flux - it’s not optional for clean joints, especially on the tiny MCU pins
- Heat the joint, not the solder - touch both the component pin and pad with your iron
- For the MCU: Use a fine tip, work slowly, and clean your iron frequently
- If you make a mistake, don’t panic - use solder wick with flux to clean up
Build order considerations
- Some builders recommend installing hotswap sockets first (if using them) since they’re easier to access
- Test fit components before final soldering when possible
- Socket the MCU - it’s much easier to replace if needed than desoldering headers
Desoldering tips
- Prevention is better than cure - double-check orientation before soldering
- For desoldering small components: Add fresh solder first (with flux), then use solder wick
- For through-hole components: Use a solder sucker from one side while heating from the other
- Be gentle - excessive force can damage PCB traces
- If a trace gets damaged, thin wire can often bridge the connection
Equipment recommendations
- KSGER T12 soldering iron with temperature control is excellent for beginners (~$25)
- Use chisel tips (T12-K, T12-BC2) for most work, fine conical (T12-I) only for MCU pins
- Good lighting and magnification help immensely
- Take breaks - fatigue leads to mistakes
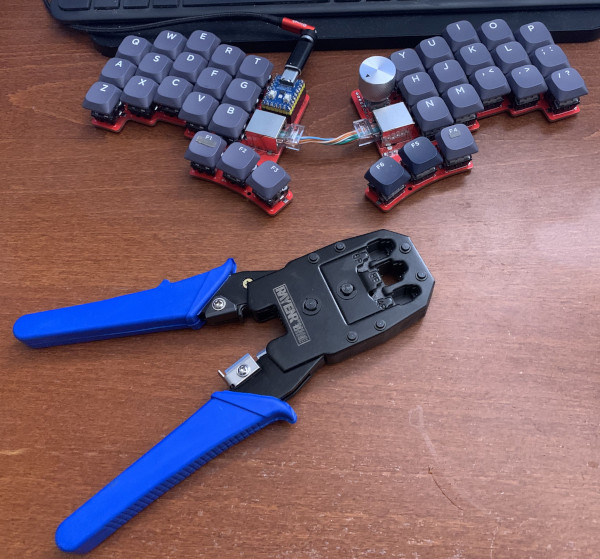
Crimper
Can’t find that 13.37 cm long dark olive green network cable that would go perfectly with your Rain Forest GMMK keycaps? Follow @jinchoung’s tip and get a cable crimper:
LED layer indication
Want to indicate active layer using the rp2040-Zero built-in LED? I tried this and found it a bit annoying… If you want to try, there is some code here: https://github.com/tompi/qmk_firmware/blob/67aa22818e2be422abdb32fc918c2b6757137a4e/keyboards/cheapino/cheapino.c#L45 Follow the firmware guide for compiling, and uncomment the layer code above.